本文着重于Vue 3 采用TypeScript的面向对象设计,探讨开发大型平台的潜力,并用Bootstrap的UI来响应式于各种终端屏幕展示数据的能力,通过element-plus应对管理型复杂UI的能力。
 爱校码
爱校码
致力于少儿编程与软件工程的信息分享
本文以城市景点项目为例,该项目采用前端-后端系统分离的方式进行开发设计,后端系统采用Django框架技术,使用Python开发语言进行面向对象设计,可参考本站其它博文中的描述。本文着重描述前端系统的开发过程,有关Vue框架与TypeScript开发语言的基础知识,可参考本站其它博文。本站之博文为爱校码.中国版权所有,未经许可,不得转载或抄袭。
一、创建项目
项目的创建通过Vue CLI(Command Line Interface)在操作系统命令行界面,执行创建项目命令,从而快速为我们搭起一个项目初始结构的脚手架。Vue CLI是一个基于Vue.js 进行快速开发的完整系统,其致力于将 Vue生态中的工具基础标准化。它确保了各种构建工具能够基于智能的默认配置即可平稳衔接,这样你可以专注在撰写应用上,而不必花时间去纠结配置的问题。
在执行Vue CLI命令之前,依次下载安装对应操作系统的Node.js,建立起npm管理安装模块库的环境,然后全局安装Vue CLI的模块库@vue/cli与@vue/cli-service,如果支持Vue CLI 4.x以上的版本,针对Node 的版本要求,需要 Node.js v8.9或更高版本 (推荐 v10以上)。使用下列命令安装新的模块包:
npm install -g @vue/cli
npm install -g @vue/cli-service
运行以下命令来创建一个新项目:
vue create cityspotc
这里的cityspotc为创建的项目名,将会在当前路径目录创建一个以项目名命名子目录,cityspot代表城市景点,c代表客户端项目。
当在操作系统命令行界面执行以上创建项目的命令时,出现以下提示信息:
? Please pick a preset: (Use arrow keys)
❯ Default ([Vue 2] babel, eslint)
  Default (Vue 3 Preview) ([Vue 3] babel, eslint)
  Manually select features
 (Move up and down to reveal more choices)
使用键盘上的上下箭头键移动选择项目创建时的选项,默认为Vue 2项目创建的相关依赖选项。本文的项目创建时将箭头移到Manually select features选项,按「回车」键进入下一步的信息提示:
? Please pick a preset: Manually select features
? Check the features needed for your project:
❯◉ Choose Vue version
 ◉ Babel
 ◉ TypeScript
 ◯ Progressive Web App (PWA) Support
 ◉ Router
 ◉ Vuex
 ◯ CSS Pre-processors
 ◉ Linter / Formatter
 ◯ Unit Testing
 ◯ E2E Testing
通过键盘的上下箭头键上下移动选项,使用键盘 空格键来选择或取消,目前的选项为Choose Vue version、 Babel、TypeScript、Router、Vuex、Linter / Formatter。按「回车」键进入下一步的信息提示:
? Please pick a preset: Manually select features
? Check the features needed for your project: Choose Vue version, Babel, TS, Router, Vuex, Linter
? Choose a version of Vue.js that you want to start the project with
  2.x
❯ 3.x (Preview)
选择Vue.js的版本为 3.x,按「回车」键进入下一步的信息提示:
? Please pick a preset: Manually select features
? Check the features needed for your project: Choose Vue version, Babel, TS, Router, Vuex, Linter
? Choose a version of Vue.js that you want to start the project with 3.x (Preview)
? Use class-style component syntax? (y/N)  Yes
? Use Babel alongside TypeScript (required for modern mode, auto-de? Use Babel alongside TypeScript (required for modern mode, auto-detected polyfills, transpiling JSX)? No
? Use history mode for router? (Requires proper server setup for index fallback in production) (Y/n) Yes
? Pick a linter / formatter config: Basic
? Pick additional lint features: Lint on save
? Where do you prefer placing config for Babel, ESLint, etc.? In dedicated config files
? Save this as a preset for future projects? (y/N) No
通过提示信息进行相应的配置,按「回车」键进入下一步的信息提示:
Vue CLI v4.5.9
Creating project in /Users/zhaocj/myvue/cityspotc.
Initializing git repository...
Installing CLI plugins. This might take a while...

Invoking generators...
Installing additional dependencies...

added 126 packages from 108 contributors in 16.682s

112 packages are looking for funding
  run `npm fund` for details

Running completion hooks...

Generating README.md...

Successfully created project cityspotc.
Get started with the following commands:

 $ cd cityspotc
 $ npm run serve
已经成功的创建了项目cityspotc,并且在当前的目录下创建了子目录 cityspotc。通过操作系统的cd命令切换到项目路径下,然后执行命令npm run serve,将会启动一个开发服务器 (基于 webpack-dev-server)。
$ cd cityspotc
$ npm run serve

> cityspotc@0.1.0 serve /Users/zhaocj/myvue/cityspotc
> vue-cli-service serve

 INFO  Starting development server...
98% after emitting CopyPlugin

 DONE  Compiled successfully in 5673ms    17:30:12

  App running at:
  - Local:   http://localhost:8080/
  - Network: http://10.22.131.77:8080/

  Note that the development build is not optimized.
  To create a production build, run npm run build.
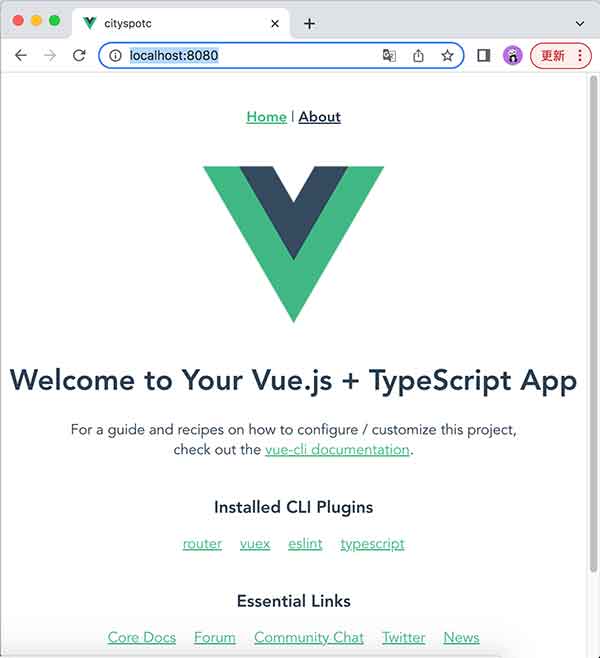
在浏览器的地址栏输入:http://localhost:8080/,则展示已创建的脚手架项目的主页:
二、项目结构
2.1 项目目录结构
脚手架项目创建后,使用Visual Studio Code编程环境打开已创建项目的文件夹,其目录结构如下:
 cityspotc/
| -- node_modules/    <-- 当前脚手架项目所依赖模块库,内容多,就不展开了。
| -- public/
|        | -- favicon.ico   // 静态资源,提供网站的缩略标志,可根据项目需求替换为自己设计的favicon.ico。
|        + -- index.html  //该文件是一个会被html-webpack-plugin处理的主页模板,在构建时资源链接会被自动注入。
| -- src/
|        | -- assets/
|        |       + -- logo.png  //可替换为自己的Logo设计。
|        | -- components/
|        |       + -- HelloWorld.vue //生成的一个单文件组件
|        | -- router/
|        |        + -- index.ts  //页面导航路由链接映射,在该文件中进行编程配置。
|        | -- store/
|        |        + -- index.ts  //实现前端页面组件的数据总线,在该文件中进行编程。
|        | -- views/
|        |        | -- About.vue   //页面视图的单文件组件
|        |        | -- Home.vue  //主页视图的单文件组件
|        | -- App.vue    //单文件组件的根组件,是其它单文件组件的入口文件。
|        | -- main.ts    //是整个项目程序的入口编程文件。
|        + -- shims-vue.d.ts   //是为TypeScript所做的适配声明文件,使得TS能够理解vue文件。
| -- .browserslistrc     //该文件是配置兼容浏览器。
| -- .eslintrc.js        //eslint使用的配置文件。
| -- .gitignore          //git上传需要忽略的文件配置。
| -- package-lock.json   //lock代表锁定的含义,用来锁定当前开发使用的版本号。
| -- package.json        //该文件定义了该项目所依赖的模块库,以及项目的配置信息。
| -- README.md           //使用说明 , 介绍整个项目的使用及功能。
+ -- tsconfig.json       //用于配置TypeScript编译时的配置选项。
2.2 package.json配置文件
当我们创建项目时,都是处于Node.js模块管理当中,创建了一个项目,意味着创建了一个模块,项目名也就是模块名,这个模块的描述文件,被称为package.json。其中包含了该模块所依赖的其它模块库,以及该模块的基本配置信息,包含名称、版本等信息。
{
  "name": "cityspotc",                              //项目名。
  "version": "0.1.0",                               //项目版本。
  "private": true,                                  //是否私人项目。
  "scripts": {                                      //指定了运行脚本命令的npm命令行缩写。
    "serve": "vue-cli-service serve",               //npm run serve,启动开发服务器。
    "build": "vue-cli-service build",               //npm run build,打包构建项目,输出目标文件。
    "lint": "vue-cli-service lint"                  //npm run lint,自动修复bug。
  },
  "dependencies": {                                 //设定的是运行时使用的依赖模块。
    "vue": "^3.0.0",
    "vue-class-component": "^7.2.6",
    "vue-router": "^4.0.0-0",
    "vuex": "^4.0.0-0"
  },
  "devDependencies": {                              //设定的是开发时使用的依赖模块
    "@typescript-eslint/eslint-plugin": "^4.18.0",
    "@typescript-eslint/parser": "^4.18.0",
    "@vue/cli-plugin-eslint": "~4.5.9",
    "@vue/cli-plugin-router": "~4.5.9",
    "@vue/cli-plugin-typescript": "~4.5.9",
    "@vue/cli-plugin-vuex": "~4.5.9",
    "@vue/cli-service": "~4.5.9",
    "@vue/compiler-sfc": "^3.0.0",
    "@vue/eslint-config-typescript": "^7.0.0",
    "eslint": "^6.7.2",
    "eslint-plugin-vue": "^7.0.0",
    "typescript": "~4.1.5"
  }
}
以上是脚手架项目的默认配置,显然我们的项目城市景点需要新的 UI模块和通信模块,相关的安装如下:
npm install bootstrap
npm install element-plus@^1.1.0-beta.24
npm install axios
这里的安装都是没有选项的安装,它和 npm install 模块名 --save (简写为-S)这样的选项安装相同,都会自动把模块和版本号添加到package.json文件的dependencies配置项内,设定为运行时依赖。如果选择 npm install 模块名 --save-dev(简写为-D)这样的选项安装,则会自动把模块和版本号添加到package.json文件的devDependencies配置项内,设定为开发时依赖。
安装后的package.json文件的dependencies配置项为:
...
"dependencies": {
    "axios": "^0.27.2",
    "bootstrap": "^5.1.3",
    "element-plus": "^1.1.0-beta.24",
    "vue": "^3.0.0",
    "vue-class-component": "^7.2.6",
    "vue-router": "^4.0.0-0",
    "vuex": "^4.0.0-0"
},
...
2.3 main.ts 程序入口文件
项目程序的入口文件为main.ts,它为TypeScript程序的启动点,其中完成Vue的对象实例化,并引入单文件组件的根组件App.vue,同时使用了路由模块router和数据总线模块store。默认脚手架项目的main.ts的代码如下:
import { createApp } from 'vue'
import App from './App.vue'
import router from './router'
import store from './store'

createApp(App).use(store).use(router).mount('#app')
Vue 3使用createApp方法返回一个提供应用上下文的实例对象,其将单文件组件的根组件App作为创建对象时的参数,实例对象挂载的整个组件树共享同一个上下文。并在其后链式调用其他方法,在同一个对象上多次调用use方法,来自动安装插件store与router。最后通过调用mount方法挂载根组件实例到id为#app页面HTML元素标记对象上,其位置在cityspotc/public目录内的index.html文件中。
在我们的项目中,需要引入Bootstrap、element-plus模块及其CSS样式,并引入通信模块axios。考虑代码如下:
import { createApp } from 'vue'
import App from './App.vue'
import router from './router'
import store from './store'
import 'bootstrap/dist/css/bootstrap.min.css'
import 'bootstrap/dist/js/bootstrap.min.js'
import ElementPlus from 'element-plus'
import 'element-plus/theme-chalk/index.css'
import api from "./api/index";

const app = createApp(App)
// 全局挂载axios
app.config.globalProperties.$axios = api
app.use(store).use(router).use(ElementPlus).mount('#app')
其中的api为引入通信模块axios,并设为vue实例对象的全局属性。关于api内的设计,后续将会展开。
2.4 App.vue单文件根组件
在src文件夹的顶层有一个名为 App.vue 的文件,此处存放了一个应用根组件。该文件的结构也是符合单文件组件的template、script、style之结构要求:
<template>
   <div id="nav">
     <router-link to="/">Home</router-link> |
     <router-link to="/about">About</router-link>
   </div>
   <router-view/>
</template>

<style>
 #app {
   font-family: Avenir, Helvetica, Arial, sans-serif;
   -webkit-font-smoothing: antialiased;
   -moz-osx-font-smoothing: grayscale;
   text-align: center;
   color: #2c3e50;
 }

 #nav {
   padding: 30px;
 }

 #nav a {
   font-weight: bold;
   color: #2c3e50;
 }

 #nav a.router-link-exact-active {
   color: #42b983;
 }
 </style>
当前的这个文件仅有template、style部分,而没有script部分。本文的项目将对该文件重新规划设计。先来看一下当前文件的template部分中的<router-view/>标记的内容,以及<router-link to="#">..</router-link>的标记内容。这意味着使用了router-view组件和router-link组件(需要由事件触发),表示页面路由,它们使得src/router/index.ts 程序得到执行,它在main.ts程序中已经导入(import router from './router'),并且已经使用(app.use(router)):
import { createRouter, createWebHistory, RouteRecordRaw } from 'vue-router'
import Home from '../views/Home.vue'

const routes: Array<RouteRecordRaw> = [
  {
    path: '/',
    name: 'Home',
    component: Home
  },
  {
    path: '/about',
    name: 'About',
    // 路由级代码拆分
    // 这会为此路由生成一个单独的块 (about.[hash].js)
    // 访问路由时延迟加载。
    component: () => import(/* webpackChunkName: "about" */ '../views/About.vue')
  }
]

const router = createRouter({
  history: createWebHistory(process.env.BASE_URL),
  routes
})

export default router
这里的程序表示了页面路由表的配置,用到了 Home.vue、About.vue单文件组件,默认加载显示Home组件,当页面模板使用router-link组件时进行路由切换。后续项目也要对该文件进行重新路由配置。
现在重新考虑App.vue 根组件设计:
<template>
    <Nav></Nav>
    <div class="container">
        <div class="row">
            <router-view/>
        </div>
    </div>
    <Footer></Footer>
</template>
<script lang="ts">
    import {
          defineComponent,
    } from "vue";
    import Nav from "@/components/Nav.vue";
    import Footer from "@/components/Footer.vue";

    export default defineComponent({
       name: "app",
       components: { Nav, Footer },
     });
</script>
这里的App.vue主要包含了子组件Nav与 Footer以及通过router-view组件路由针对页面视图组件调用之目的。
2.5 基于 vue-router的路由
Vue Router 是 Vue 生态系统的一部分,是一个 MIT(Massachusetts Institute of Technology,麻省理工学院) 许可的开源项目,其持续开发完全是在赞助商的支持下实现的。该模块已经安装在脚手架项目中("vue-router": "^4.0.0-0",),并在main.ts程序中使用了:
import { createApp } from 'vue'
...
import router from './router'
...
const app = createApp(App)
....
app.use(store).use(router).use(ElementPlus).mount('#app')
这里的'./router'指的是文件夹router下的index.ts模块:
import { createRouter, createWebHistory, RouteRecordRaw } from 'vue-router'

const routes: Array<RouteRecordRaw> = [
  {
    path: "/citys",
    name: "城市列表",
    component: () => import('../views/Citys.vue')
  },
  {
    path: "/citys/:id",
    name: "城市详情",
    component: () => import('../views/CityDetail.vue')
  },
  {
    path: "/citys/newcity",
    name: "新增城市",
    component: () => import('../views/NewCity.vue')
  },
  {
    path: "/",
    redirect: "/citys"
  }
]

const router = createRouter({
  history: createWebHistory(process.env.BASE_URL),
  routes
})

export default router
此处的默认路由为path: "/",,重定向到path:"/citys"(redirect: "/citys"),其映射对应的单文件组件是Citys.vue。而路由path: "/citys/:id"映射对应的单文件组件是CityDetail.vue。其中:id为路由参数。路由path: "/citys/newcity"映射对应的单文件组件是NewCity.vue。
2.6 文件夹components与文件夹 views下的单文件组件设计
components目录与views目录结构如下:
   cityspotc/
    | ...
    | -- src/
    |        | ...
    |        | -- components/
    |        |       | -- Nav.vue
    |        |       + -- Footer.vue
    |        | ...
    |        | -- views/
    |        |       | -- CityDetail.vue
    |        |       | -- Citys.vue
    |        |       + -- NewCity.vue
    | ...
看一下Nav.vue组件,按照Bootstrap中的导航nav设计:
<template>
    <nav class="navbar navbar-expand-sm navbar-dark bg-dark">
        <div class="container">
          <a class="navbar-brand" href="#">
            <img alt="爱校码" src="../assets/logo.png" style="width:40px;">
          </a>
          <button class="navbar-toggler" type="button" data-toggle="collapse"
              data-target="#mainMenu" aria-controls="mainMenu" aria-expanded="false"
              aria-label="Toggle navigation">
             <span class="navbar-toggler-icon"></span>
          </button>
          <div class="collapse navbar-collapse" id="mainMenu">
             <ul class="navbar-nav mr-auto">
               <li class="nav-item">
                 <router-link to="/citys" class="nav-link" @click="onClick">城市列表 </router-link>
               </li>
               <li class="nav-item">
                <router-link to="/newcity" class="nav-link" @click="onClick">新增城市</router-link>
               </li>
            </ul>
          </div>
        </div>
    </nav>
</template>

<script lang="ts">
  import {
    defineComponent,
  } from "vue";

  export default defineComponent({
    name: "mynav",

    setup(props,ctx) {
      const onClick= ()=>{
        console.log("Nav: onClick")
      };

      // 暴露给模板
      return {
        onClick
      };
    },
  });
</script>
这里主要有两个导航:<router-link to="/citys"和<router-link to="/newcity",分别调用Citys.vue和NewCity.vue单文件组件。
下一步看一下Footer.vue组件:
<template>
<div class="footer">
<p class="footer-content">
© 2022 ischoolcode.cn 爱校码.中国 版权所有
<a href="http://beian.miit.gov.cn">粤ICP备19044405号</a>
</p>
</div>
</template>
该组件只有静态部分<template>,没有代码<script lang="ts">和样式<style>。只不过样式统一按照bootstrap.css要求来做,该样式已在main.ts程序中引入(import 'bootstrap/dist/css/bootstrap.min.css')。
下一步看一下Citys.vue组件:
<template>
   <div class="container">
     <ol class="breadcrumb my-4">
        <li class="breadcrumb-item active">城市旅游景点</li>
     </ol>
     <table class="table">
        <thead class="thead-inverse">
           <tr>
              <th>城市名</th>
              <th>描述</th>
           </tr>
        </thead>
        <tbody>
           <tr v-for="city in list" v-bind:key="city.id">
              <td>
                 <router-link to="#" class="nav-link" @click="onClick">
                     {{ city.name }}
                 </router-link>
             </td>
             <td class="align-middle">
                  {{ city.description }}
             </td>
           </tr>
        </tbody>
      </table>
     </div>
</template>
<script lang="ts">
    import {
       defineComponent,
       computed,
       onMounted,
   } from "vue";
   import { useStore } from "vuex";

    export default defineComponent({
       name: "citys",

       setup() {
          const store = useStore();
          const list = computed((): Array<object> => {
             return store.state.cityList;
          });
          // 生命周期
          onMounted(() => {
             store.dispatch("getCityList");
          });

           // 暴露给模板
           return {
              list,
           };
        },
    });
</script>
该单文件组件为项目中的一个 重要组件,它已经在加载数据了。先看<template>部分,除了按照bootstrap的<div class="container">布局外,其中用到了 v-for指令取得vue实例对象绑定的模型数据。再来看代码部分·<script lang="ts">,首先从vue实例中导入了defineComponent定义组件方法,computed计算属性方法,onMounted生命周期钩子函数方法。同时从数据总线模块导入了useStore方法,用于创建数据总线对象。然后在 setup方法中,获得store数据总线对象;通过computed方法得到计算属性list,而在方法中,依赖数据总线对象中state项返回结果,后续将对数据总线的设计进一步解析;在onMounted方法中,通过数据总线对象的dispatch方法激活数据总线对象中actions项的异步操作getCityList,同样,后续进一步解析。setup方法的最后,通过return返回计算属性list。
其他vue单文件组件,在后续的扩展中将做分析。
2.7 Vuex数据总线
Vuex 是什么?Vuex 是一个专为Vue.js 应用程序开发的状态管理模式库。它采用集中式存储管理应用的所有组件的状态,并以相应的规则保证状态以一种可预测的方式发生变化。
通过定义和隔离状态管理中的各种概念并通过强制规则维持视图和状态间的独立性,程序代码将会变得更结构化且易维护。这就是 Vuex 背后的基本思想,充分利用Vue.js 的细粒度数据响应机制来进行高效的状态更新。
如果需要构建一个中大型单页应用,很可能会考虑如何更好地在组件外部管理状态,Vuex 将会成为自然而然的选择。
虽然城市景点项目现在的功能简单,我们给它将来的扩展性,它在main.ts程序中已经导入(import store from './store'),并且已经使用(app.use(store)):
import { createStore } from 'vuex'
import api from "../api/index";

export default createStore({
  state: {
    cityList:[]
  },
  getters: {
  },
  mutations: {
    setCityList(state, data) {
      state.cityList = data;
    }
  },
  actions: {
   getCityList(context) {
       api.get("/citys/")
         .then((res) => {
            context.commit("setCityList", res.data);
       })
        .catch(function (error) {
           console.log(error);
      });
    }
  },
  modules: {
  }
});
这里的代码,首先从vuex模块中导入了createStore方法,用于创建实例对象,直接将其导出export。然后导入通信模块api,其中用到了axios通信模块,后续将对其进一步解析。可以看出,数据总线模块是唯一和后端系统有通信联系的模块。
在createStore方法中的对象参数包含了state、getters、mutations、actions、modules属性项,这里用到了state、mutations、actions属性项。在actions属性项中,包含了getCityList异步方法,它由调用方通过总线对象store的dispatch方法来激活。
在getCityList方法的参数context上下文对象,通过commit方法触发mutations属性中的setCityList 方法,其方法参数state和data分别表示state属性对象和从后端系统返回的数据项。setCityList 方法内通过state.cityList = data;设置state属性对象的cityList数组数据项。
在getCityList方法内,通过通信模块api的get("/citys/")方法调用获取数据。接下来进一步讨论通信模块。
2.8 axios数据通信
axios是一个基于承约(Promise)异步特性的网络请求模块库,它可以用于node.js的平台环境中和浏览器中。在服务器端它使用原生node.js的 http模块,而在客户端 (指浏览端) 则使用ajax(Asynchronous Javascript And XML)的XMLHttpRequest对象。
axios本质上是对原生XHR(全称XMLHttpRequest)的封装,只不过它是承约(Promise)的实现版本,符合最新的ES6规范。
考虑以下代码(api/index.ts):
const baseUrl = "http://localhost:8000/cityspot/api";

import axios, { AxiosResponse, AxiosRequestConfig } from 'axios'

// 创建axios的实例
const service = axios.create({
  baseURL: baseUrl,
  timeout: 50000,//超时时间
  withCredentials: false,
})
// 请求拦截器
service.interceptors.request.use((config: AxiosRequestConfig) => {
  // 登录之后把token加入到头部
  if (localStorage.tsToken) {
     if(config.headers)
       config.headers.Authorization = localStorage.tsToken;
  }

  return config
}, (err: any) => {
   Promise.reject(err)
})

// 响应拦截器
service.interceptors.response.use((res: AxiosResponse) => {
  return res
}, (err: any) => {
  (error: any) => Promise.reject(error)
})

// 导出
export default service;
这里baseUrl表示后端系统的REST统一资源基地址。然后导入axios及AxiosRequestConfig、AxiosRequestConfig对象。
axios通过create方法创建其对象实例,并通过对象实例的interceptors.request.use和interceptors.response.use分别对请求和响应进行拦截,用于处理相关的信息。最终导出实例对象,实例对象可以有get、post、put、delete相关方法操作后端系统资源。
博文最后更新时间: